
Installing 32-bit Python on Windows with Anaconda: A Detailed Guide for You
Are you looking to install a 32-bit version of Python on your Windows machine using Anaconda? You’ve come to the right place. In this guide, I’ll walk you through the entire process step by step, ensuring that you have a smooth and successful installation.
Why Install a 32-bit Python on Windows?
Before diving into the installation process, let’s understand why you might want to install a 32-bit Python on your Windows machine. Here are a few reasons:

-
Compatibility: Some legacy software or libraries may require a 32-bit Python interpreter to function correctly.
-
Resource Efficiency: A 32-bit Python installation typically consumes less memory and disk space compared to a 64-bit version.
-
Development: If you’re developing software that needs to run on 32-bit systems, installing a 32-bit Python ensures compatibility.
Prerequisites
Before you begin, make sure you have the following prerequisites in place:
-
Windows Operating System: Ensure that you’re running a compatible version of Windows (e.g., Windows 7, 8, or 10).
-
Internet Connection: You’ll need an active internet connection to download the Anaconda installer.
-
Admin Rights: You’ll need administrative privileges to install Anaconda and Python on your Windows machine.
Step-by-Step Installation Guide
Now that you have the prerequisites in place, let’s proceed with the installation process:
-
Download Anaconda Installer:
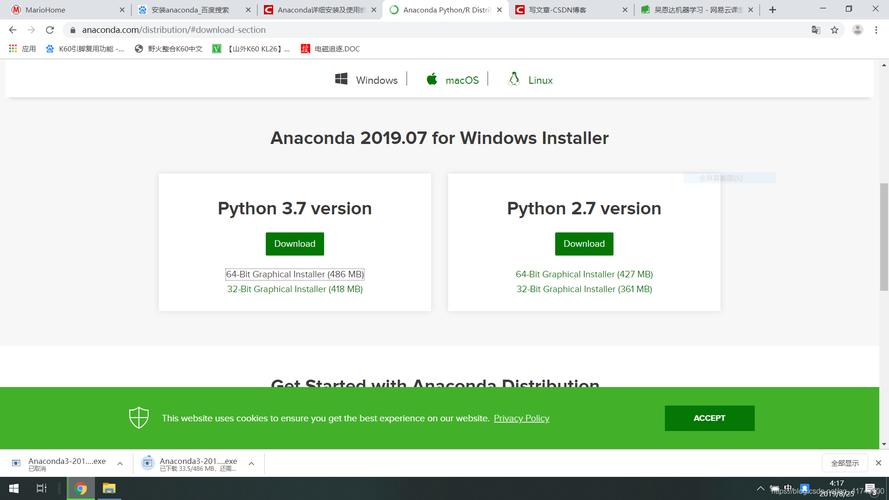
Visit the official Anaconda website (https://www.anaconda.com/products/distribution) and download the Anaconda installer for Windows. Choose the version that matches your requirements (32-bit or 64-bit).
-
Run the Installer:
Double-click the downloaded installer file to launch the installation wizard. Click “Next” to proceed.
-
Accept License Agreement:
Read the license agreement carefully and click “I agree” to proceed.
-
Select Installation Type:
Choose the “Custom” installation type to have more control over the installation process. Click “Next” to continue.
-
Select Components:
In the “Select Components” window, expand the “Python 3.x” section and select the “32-bit” version of Python. You can also choose additional components like Jupyter Notebook, Spyder, and other packages as per your requirements. Click “Next” to proceed.
-
Select Installation Folder:
By default, Anaconda will install the software in the “C:Anaconda3” folder. You can change the installation folder if needed. Click “Next” to continue.
-
Choose Start Menu Folder:
Choose the folder where you want to create shortcuts for Anaconda and Python in the Start Menu. Click “Next” to proceed.
-
Choose Additional Tasks:
Select the “Add Anaconda to my PATH environment variable” option to make Python and Anaconda commands available from the command prompt. Click “Next” to continue.
-
Review and Install:
Review your selections and click “Install” to begin the installation process. The installer will download and install the selected components.
-
Complete the Installation:
Once the installation is complete, click “Finish” to exit the installer.
Verifying the Installation
After the installation is complete, you can verify that Python and Anaconda have been installed correctly by following these steps:
-
Open Command Prompt:
Press the Windows key + R, type “cmd” in the Run dialog, and press Enter to open the Command Prompt.


