
Dremel Sanding Bits: A Comprehensive Guide for Enthusiasts
Are you looking to enhance your Dremel tool’s capabilities? Dremel sanding bits are a versatile addition to your toolkit, perfect for smoothing, finishing, and shaping various materials. In this detailed guide, we’ll explore the different types of Dremel sanding bits, their uses, and how to choose the right one for your projects.
Understanding Dremel Sanding Bits

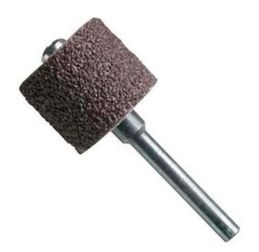
Dremel sanding bits are small, abrasive tools designed to fit into the chuck of a Dremel rotary tool. They come in various shapes, sizes, and materials, each tailored for specific tasks. Here’s a quick rundown of the different types of Dremel sanding bits:
| Type | Description |
|---|---|
| Concave Sanding Bits | Used for sanding curved surfaces and contours. |
| Convex Sanding Bits | Great for sanding flat surfaces and edges. |
| Flap Discs | Perfect for removing material quickly and smoothing surfaces. |
| Flexible Sanding Sheets | Flexible and conformable, ideal for sanding irregular shapes. |
| Carving Bits | Used for carving intricate designs and patterns. |
Now that you have a basic understanding of the different types of Dremel sanding bits, let’s dive deeper into their uses and benefits.
Choosing the Right Dremel Sanding Bit
Selecting the appropriate Dremel sanding bit for your project is crucial for achieving the desired results. Here are some factors to consider when choosing a sanding bit:
- Material: Different materials require different types of sanding bits. For example, wood projects may require a wood sanding bit, while metal projects may require a metal sanding bit.
- Surface: Consider the surface you’re working on. Curved surfaces may require a concave sanding bit, while flat surfaces may benefit from a convex sanding bit.
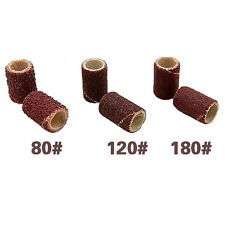
- Finishing: If you’re looking to achieve a smooth finish, choose a sanding bit with a finer grit. For more aggressive material removal, opt for a coarser grit.
- Size: Ensure the sanding bit fits your Dremel tool’s chuck and is suitable for the size of the project.
Remember, the right sanding bit can make a significant difference in the quality of your work. Take your time to research and select the best option for your needs.
Using Dremel Sanding Bits
Using Dremel sanding bits is a straightforward process. Here’s a step-by-step guide to help you get started:
- Attach the Sanding Bit: Place the sanding bit into the chuck of your Dremel tool and secure it tightly.
- Adjust the Speed: Set the appropriate speed for the sanding bit and material you’re working with. Generally, slower speeds are better for fine finishing, while faster speeds are suitable for aggressive material removal.
- Start Sanding: Hold the tool at a 45-degree angle to the workpiece and apply gentle pressure. Move the tool in a steady, back-and-forth motion to avoid overheating the bit or damaging the material.
- Change Bits as Needed: If you’re working on a large project, you may need to change sanding bits to achieve the desired finish. Always ensure the new bit is securely attached before resuming work.
By following these steps, you’ll be able to effectively use Dremel sanding bits to achieve professional results.
Benefits of Dremel Sanding Bits
Dremel sanding bits offer numerous benefits for both hobbyists and professionals:
- Versatility: With a wide range of sanding bits available, you can tackle various projects with ease.


