
Install BitTorrent for Mac: A Comprehensive Guide
Are you looking to install BitTorrent on your Mac? If so, you’ve come to the right place. BitTorrent is a powerful peer-to-peer file-sharing protocol that allows users to download and upload files quickly and efficiently. In this guide, I’ll walk you through the process of installing BitTorrent on your Mac, covering everything from downloading the software to configuring it for optimal performance.
Downloading BitTorrent for Mac

Before you can install BitTorrent on your Mac, you’ll need to download the software from the official website. Here’s how to do it:
- Open your web browser and navigate to bittorrent.com/download/mac.
- Click on the “Download” button to start the download process.
- Once the download is complete, locate the downloaded file in your Mac’s download folder.
Installing BitTorrent on Your Mac
Now that you have the BitTorrent installer file, it’s time to install the software on your Mac:
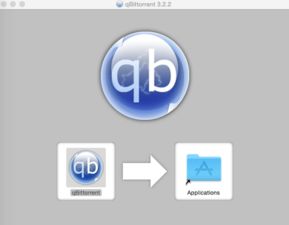
- Double-click on the installer file to launch the installation wizard.
- Click “Continue” to proceed with the installation.
- Read and accept the license agreement by clicking “Agree” or “Continue” (depending on the version of macOS you’re using).
- Select the destination folder for BitTorrent. You can either choose the default location or click “Customize” to specify a different folder.
- Click “Install” to begin the installation process.
- Enter your administrator password if prompted.
- Once the installation is complete, click “Close” to exit the installer.
Configuring BitTorrent for Optimal Performance
After installing BitTorrent, you may want to configure it to ensure optimal performance. Here are some key settings to consider:
Bandwidth Allocation
BitTorrent allows you to allocate a certain amount of bandwidth to file sharing. To adjust these settings:
- Open BitTorrent and click on the “Preferences” button.
- Go to the “Bandwidth” tab.
- Adjust the upload and download limits to your desired values.
Port Forwarding
Port forwarding is essential for ensuring that your BitTorrent client can communicate with other peers. Here’s how to set it up:
- Open your router’s web interface by entering its IP address in your web browser.
- Log in to your router using your username and password.
- Locate the port forwarding section and create a new rule.
- Enter the following information:
- Application: BitTorrent
- External Port: 6881 (or any other port you’ve configured for BitTorrent)
- Internal Port: 6881 (or any other port you’ve configured for BitTorrent)
- IP Address: Your Mac’s IP address
- Protocol: TCP/UDP
- Click “Save” or “Apply” to save the changes.
Encryption
Enabling encryption can help protect your privacy while using BitTorrent. To enable encryption:
- Open BitTorrent and click on the “Preferences” button.
- Go to the “Security” tab.
- Check the “Enable encryption” box.
- Click “Apply” to save the changes.
Using BitTorrent on Your Mac
Now that you’ve installed and configured BitTorrent, you’re ready to start using it. Here’s a quick overview of the process:
- Open BitTorrent and click on the “Create New Torrent” button.
- Browse for the file or folder you want to share and click “OK” to create the torrent.
- Copy the magnet link or torrent file and share it with others.
- Click on the “Open .torrent file” button in BitTorrent and select the torrent file you received.
- BitTorrent will start downloading the file(s) you


