
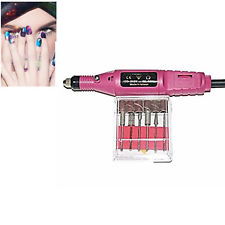
Nail Drill with Bits: A Comprehensive Guide
When it comes to maintaining your nails, a nail drill with bits is an essential tool. Whether you’re a professional nail artist or a DIY enthusiast, having the right nail drill can make all the difference. In this article, we’ll delve into the various aspects of nail drills with bits, including their types, features, and how to use them effectively.
Types of Nail Drills

There are several types of nail drills available in the market, each designed for specific purposes. Here’s a brief overview:
| Type | Description |
|---|---|
| Electric Nail Drill | Electric nail drills are powerful and provide consistent speed, making them ideal for professional use. |
| Manual Nail Drill | Manual nail drills are less expensive and require manual effort to operate. They are suitable for beginners and DIY enthusiasts. |
| USB Nail Drill | USB nail drills are portable and can be charged using a USB cable. They are convenient for on-the-go use. |
Features to Consider
When choosing a nail drill with bits, there are several features to consider to ensure you get the best tool for your needs:
- Speed Control: Look for a nail drill that offers adjustable speed settings to accommodate different nail types and techniques.
- Power Source: Decide whether you prefer an electric, manual, or USB-powered nail drill based on your requirements and budget.
- Bit Selection: Ensure the nail drill comes with a variety of bits to cater to different nail shapes and designs.
- Comfort and Grip: A comfortable grip and lightweight design make the nail drill easier to handle and reduce hand fatigue.
- Portability: If you’re frequently on the move, consider a portable nail drill with a compact design and easy storage options.
How to Use a Nail Drill with Bits

Using a nail drill with bits is a straightforward process. Here’s a step-by-step guide to help you get started:
- Prepare Your Nails: Begin by cleaning and shaping your nails using a nail file or buffer.
- Choose the Right Bit: Select the appropriate bit for the desired nail design or correction. Bits come in various shapes and sizes, such as round, flat, and ball-shaped.
- Attach the Bit: Secure the chosen bit onto the nail drill’s shaft using the appropriate adapter.
- Adjust the Speed: Set the desired speed based on the nail type and technique you’re using.
- Start Drilling: Hold the nail drill at a 45-degree angle to the nail surface and gently press down to start drilling. Apply even pressure to avoid damaging the nail.
- Monitor the Progress: Keep an eye on the nail as you drill to ensure you’re achieving the desired result. Adjust the speed or pressure if needed.
- Clean Up: Once you’ve finished, remove the bit and clean the nail drill to prevent any buildup or damage.
Benefits of Using a Nail Drill with Bits
Using a nail drill with bits offers several benefits, including:
- Customization: A nail drill allows you to create unique nail designs and shapes that cannot be achieved with traditional nail tools.
- Efficiency: Drilling nails is faster and more efficient than using traditional methods, such as filing or sanding.
- Accuracy: A nail drill provides precise control, making it easier to achieve the desired results.
- Health and Safety: Using a nail drill reduces the risk of injury compared to using sharp tools like nail files or buffers.
Conclusion
In conclusion, a nail drill with bits is a versatile and essential tool for anyone interested in nail art or maintenance. By understanding the different types, features, and proper usage


