
ISO 64-bit Windows 10: A Comprehensive Guide for Users
Embarking on the journey of using a 64-bit Windows 10 operating system can be an exciting experience. With its enhanced performance and capabilities, it offers a world of opportunities for both personal and professional use. In this detailed guide, we will explore the various aspects of ISO 64-bit Windows 10, ensuring you have a thorough understanding of its features and functionalities.
Understanding 64-bit vs. 32-bit

Before diving into the specifics of Windows 10, it’s essential to understand the difference between 64-bit and 32-bit systems. While both versions of Windows 10 offer similar functionalities, the 64-bit version is designed to handle larger amounts of memory and run more advanced applications. This section will provide a clear comparison between the two, helping you make an informed decision.
| Feature | 32-bit | 64-bit |
|---|---|---|
| Memory Support | Up to 4GB | Up to 128GB (or more, depending on the hardware) |
| Application Compatibility | Most applications are compatible | Most applications are compatible, including those designed for 32-bit systems |
| Performance | May experience limitations with certain applications | Enhanced performance, especially with memory-intensive tasks |
As you can see from the table, the 64-bit version of Windows 10 offers several advantages over its 32-bit counterpart. However, it’s important to note that not all hardware and software are compatible with the 64-bit version, so it’s crucial to ensure that your system meets the necessary requirements before making the switch.
Downloading and Installing ISO 64-bit Windows 10
Once you’ve decided to go with the 64-bit version of Windows 10, the next step is to download and install the ISO file. This section will guide you through the process, ensuring a smooth and hassle-free installation.
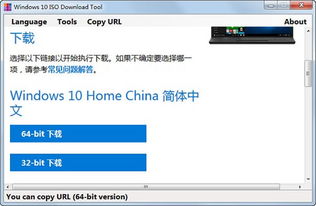
- Visit the official Microsoft website or a trusted third-party source to download the ISO file.
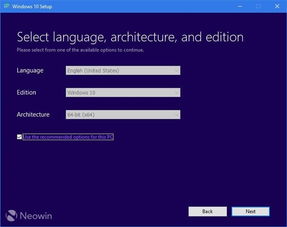
- Choose the edition of Windows 10 that best suits your needs (e.g., Home, Pro, Enterprise).
- After downloading the ISO file, create a bootable USB drive using a tool like Rufus or Windows Media Creation Tool.
- Restart your computer and boot from the USB drive.
- Follow the on-screen instructions to install Windows 10.
It’s important to note that the installation process may take some time, depending on your hardware and internet connection. Additionally, make sure to back up your important files before proceeding with the installation.
Customizing Your Windows 10 Experience
Once you’ve successfully installed Windows 10, it’s time to customize your experience. This section will cover various aspects of customization, including themes, wallpaper, and settings.
- Personalize your desktop background by selecting a wallpaper from the built-in collection or importing your own image.
- Choose a theme that matches your style, or create a custom theme by selecting colors and sounds.
- Customize the taskbar by adding or removing icons, adjusting the size, and enabling or disabling features like search and task view.
- Adjust system settings to optimize performance, manage privacy, and configure network and power options.
Windows 10 offers a wide range of customization options, allowing you to create a personalized and efficient workspace. Experiment with different settings and themes to find the perfect combination for your needs.
Enhancing Security and Privacy
Security and privacy are crucial aspects of any operating system. This section will provide tips and best practices for enhancing the security and privacy of your ISO 64-bit Windows 10 system.
- Enable Windows Defender, Microsoft’s built-in antivirus and anti-malware solution, to protect your system from threats.
- Keep your system up to date by installing the latest updates and security patches.
- Use a strong, unique password for your user account and enable two-factor authentication for added security.


