
Descargar DirectX 11 para Windows 10 64 Bits: A Comprehensive Guide
Are you looking to download DirectX 11 for your Windows 10 64-bit system? If so, you’ve come to the right place. DirectX is a collection of APIs (Application Programming Interfaces) that allows developers to create rich multimedia applications and games. In this guide, I’ll walk you through the process of downloading and installing DirectX 11 on your Windows 10 64-bit machine, ensuring you have everything you need to enjoy the latest in graphics and multimedia.
Understanding DirectX 11

DirectX 11 is a significant update to the DirectX API suite, offering improved performance and new features that enhance the gaming and multimedia experience. It supports features like multi-threading, which allows for better utilization of modern multi-core processors, and it’s optimized for DirectX 11-compatible graphics cards.
Why Download DirectX 11 for Windows 10 64 Bits?

While Windows 10 comes with DirectX 12 pre-installed, DirectX 11 is still widely used for compatibility reasons. Many older games and applications are optimized for DirectX 11, and some may not run properly on DirectX 12. Here are a few reasons why you might want to download DirectX 11:
- Compatibility with older games and applications
- Improved performance on certain hardware
- Access to specific features that DirectX 12 does not support
How to Download DirectX 11 for Windows 10 64 Bits
Downloading DirectX 11 for Windows 10 64-bit is a straightforward process. Here’s what you need to do:
- Open your web browser and navigate to the official Microsoft DirectX website.
- Scroll down to the “Download DirectX End-User Runtime Web Installer” section.
- Click on the “Download” button to start the download process.
- Once the download is complete, run the installer.
- Follow the on-screen instructions to install DirectX 11 on your system.
It’s important to note that DirectX 11 is included with Windows 10, so you may not need to download it separately. However, the installer ensures that all DirectX components are up to date and compatible with your system.
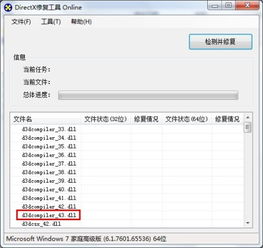
Verifying DirectX 11 Installation
After installing DirectX 11, you may want to verify that it’s correctly installed on your system. Here’s how you can do that:
- Press the “Windows” key and type “dxdiag” in the search bar.
- Press “Enter” to open the DirectX Diagnostic Tool.
- In the “System” tab, you should see DirectX 11 listed as the current version.
Common Issues and Solutions
While installing DirectX 11, you may encounter some issues. Here are a few common problems and their solutions:
- Problem: The DirectX installer fails to run.
- Solution: Ensure that your system meets the minimum requirements for DirectX 11. Also, try running the installer as an administrator.
- Problem: DirectX 11 is not recognized after installation.
- Solution: Restart your computer and run the DirectX Diagnostic Tool to verify the installation.
- Problem: Games or applications are not running properly with DirectX 11.
- Solution: Check the game or application’s system requirements and ensure that your graphics card drivers are up to date.
Additional Resources
For more information on DirectX 11 and its features, you can visit the following resources:
- Microsoft DirectX End-User Runtime Web Installer
- Microsoft DirectX Documentation
- Guru3D DirectX 11 Features Guide
By following this guide, you should now have DirectX 11 installed on your Windows 10 64-bit system. Enjoy the enhanced gaming and multimedia experience that


