
ffmpeg Recode to 10-bit Without Changing Codec: A Detailed Guide
When it comes to video processing, the quality of the output often hinges on the bit depth. 10-bit color depth offers a significant improvement over the standard 8-bit, providing a wider color gamut and more accurate color representation. If you’re looking to upgrade your video to 10-bit without changing the codec, ffmpeg is the tool you need. In this guide, I’ll walk you through the process step by step, ensuring you achieve the desired outcome without any complications.
Understanding Bit Depth

Before diving into the details of using ffmpeg, it’s essential to understand what bit depth is and why it matters. Bit depth refers to the number of bits used to represent the color of a pixel. An 8-bit color depth can represent 256 shades of each color, while a 10-bit depth can represent 1024 shades. This increased range allows for more subtle color gradations and a more vibrant and accurate image.
Why Use ffmpeg?
ffmpeg is a powerful, open-source tool that can handle a wide range of video and audio processing tasks. It’s widely used by professionals and hobbyists alike due to its versatility and extensive feature set. One of its standout features is the ability to re-encode videos without changing the codec, which is exactly what we need for this task.
Prerequisites
Before you begin, ensure you have the following prerequisites in place:
- ffmpeg installed on your system
- Access to a video file you wish to re-code to 10-bit
- A basic understanding of the command line interface
Step-by-Step Guide
Now that you have everything in place, let’s go through the process of recoding your video to 10-bit using ffmpeg.
Step 1: Check the Current Bit Depth
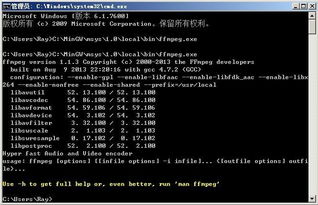
Before you start, it’s a good idea to check the current bit depth of your video. You can do this using the following command:
ffmpeg -i input.mp4This command will output various information about your video, including the bit depth. Look for the “Stream 0:0” section and check the “Pixel format” line. If it’s not 10-bit, you’ll need to proceed with the re-encoding process.
Step 2: Convert to 10-bit
Once you’ve confirmed the bit depth, you can proceed with the conversion using the following command:
ffmpeg -i input.mp4 -c:v libx265 -preset medium -x265-params colorprim=bt2020:native -map 0:v -c:a copy output.mp4This command uses the libx265 codec, which supports 10-bit color depth. The “-preset medium” option balances quality and encoding speed, while the “-x265-params colorprim=bt2020:native” ensures that the color space is set to BT.2020, which is the standard for 10-bit content.
Step 3: Verify the Output
After the conversion process is complete, verify the output file to ensure that the bit depth has been successfully changed. You can use the same command from Step 1 to check the bit depth of the output file.
Additional Tips
Here are a few additional tips to help you achieve the best results:
- Consider using a higher bit rate to ensure better quality. You can adjust the bit rate using the “-b:v” option.
- Experiment with different codecs and settings to find the combination that works best for your specific needs.
- Keep in mind that 10-bit content may not be compatible with all devices and platforms. Ensure that your target audience can view the content in 10-bit.
By following this guide, you should now have a clear understanding of how to use ffmpeg to recode your videos to 10-bit without changing the codec. With this knowledge, you can enhance the quality of your videos and provide a more immersive experience for your audience.


