
Windows 7 64-bit Download: A Comprehensive Guide
Are you looking to download Windows 7 64-bit? If so, you’ve come to the right place. In this detailed guide, I’ll walk you through the process of downloading, installing, and setting up Windows 7 64-bit on your computer. Whether you’re a tech-savvy user or a beginner, this guide will provide you with all the information you need.
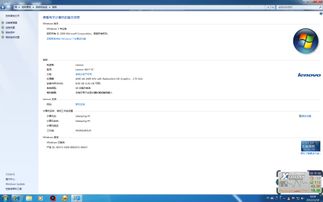
Why Choose Windows 7 64-bit?

Windows 7 64-bit offers several advantages over its 32-bit counterpart. Here are a few reasons why you might want to choose the 64-bit version:
- Better Performance: 64-bit operating systems can handle more RAM, which can lead to improved performance, especially for resource-intensive applications.
- Compatibility: Some software and hardware may only be compatible with the 64-bit version of Windows 7.
- Security: 64-bit systems can provide enhanced security features compared to 32-bit systems.
Now that you know why you might want to download Windows 7 64-bit, let’s dive into the process.
Where to Find the Windows 7 64-bit Download
There are several legitimate sources where you can download Windows 7 64-bit. Here are a few options:
- Microsoft’s Official Website: You can purchase a Windows 7 64-bit ISO file directly from Microsoft’s website. This is the most reliable source, but it also comes with a price tag.
- Third-Party Websites: There are several third-party websites that offer free Windows 7 64-bit ISO files. However, be cautious when downloading from these sources, as some may contain malware or viruses.
- Physical Media: You can also purchase a Windows 7 64-bit installation disc from a local or online retailer.
When downloading from third-party websites, always ensure that the source is reputable and that the file has been verified for malware. It’s also a good idea to use a reputable antivirus program to scan the downloaded file before proceeding with the installation.
Downloading Windows 7 64-bit
Once you’ve decided where to download Windows 7 64-bit, follow these steps:
- Go to the chosen source and locate the Windows 7 64-bit ISO file.
- Click on the download link and wait for the file to download to your computer.
- Once the download is complete, you’ll have an ISO file on your computer. This file can be used to create a bootable USB drive or burn it to a DVD.
Creating a Bootable USB Drive
Creating a bootable USB drive is the most common method for installing Windows 7 64-bit. Here’s how to do it:
- Download a USB flash drive creation tool, such as Rufus or Windows 7 USB/DVD Download Tool.
- Insert a USB flash drive into your computer and ensure it has enough space to hold the ISO file (at least 4GB for Windows 7).
- Open the USB flash drive creation tool and select the ISO file you downloaded.
- Follow the on-screen instructions to create the bootable USB drive.
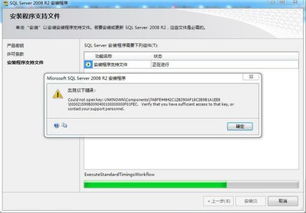
Installing Windows 7 64-bit
Once you have a bootable USB drive, follow these steps to install Windows 7 64-bit:
- Insert the bootable USB drive into your computer and restart it.
- Press the appropriate key (usually F2, F10, or Del) to enter the BIOS or UEFI settings.
- Change the boot order so that your computer boots from the USB drive.
- Save the changes and exit the BIOS or UEFI settings.
- Follow the on-screen instructions to install Windows 7 64-bit.
Post-Installation Steps
After installing Windows 7 64-bit, there are a few post-installation steps you should take:
- Update Drivers: Visit the manufacturer’s website for your computer’s hardware components and download the latest drivers.


