
3ds Max to 8 Bit: A Comprehensive Guide
Are you an aspiring 3D artist looking to explore the fascinating world of 8-bit graphics? If so, you’ve come to the right place. In this article, we’ll delve into the process of converting your 3D models from Autodesk 3ds Max to the charming 8-bit style. We’ll cover everything from the basics of 8-bit art to the technical aspects of the conversion process. Let’s get started!
Understanding 8-bit Art

Before we dive into the conversion process, it’s essential to understand what 8-bit art is. 8-bit art refers to graphics created using a limited color palette, typically 256 colors. This style of art has a nostalgic charm and is often associated with early video games and pixel art. The limited color palette forces artists to be creative and make the most of the available hues.
8-bit art is characterized by its pixelated look, which adds a unique texture to the images. The limited color palette also requires artists to be mindful of color theory and how different hues can be combined to create a cohesive and visually appealing composition.
Setting Up Your 3ds Max Project
Before you begin converting your 3D models to 8-bit, you’ll need to set up your 3ds Max project. Here’s a step-by-step guide to help you get started:
- Open 3ds Max and create a new project.
- Set the units to match your desired output resolution. For example, if you’re aiming for a 16:9 aspect ratio, set the units to centimeters and the scale to 1 unit = 1 centimeter.
- Adjust the viewport settings to ensure your models are visible and easily manipulated.
- Import your 3D models into the project.
Once your project is set up, you’re ready to begin the conversion process.
Converting Your Models to 8-bit
Converting your 3D models to 8-bit involves several steps. Here’s a detailed guide to help you through the process:
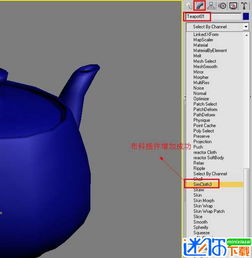
- Reduce the Color Palette: Start by reducing the color palette of your models. In 3ds Max, you can do this by using the “Material/Map Browser” to select the materials on your models and adjusting the “Color 1” and “Color 2” slots to your desired 8-bit colors.
- Subdivide Your Models: To achieve the pixelated look, you’ll need to subdivide your models. Use the “Subdivide” modifier to add extra edges and vertices to your models. The more edges and vertices you add, the more pixelated the model will appear.
- Adjust the Subdivision Level: Experiment with different subdivision levels to find the perfect balance between detail and pixelation. Keep in mind that higher subdivision levels will increase the file size and may slow down rendering.
- Apply the 8-bit Material: Create a new material with a limited color palette and apply it to your models. You can use the “Material/Map Browser” to select the “8-bit” material and adjust the color slots to your desired 8-bit colors.
- Render Your Models: Once you’re satisfied with the appearance of your models, render them using the 8-bit material. You can use the “Render Scene” dialog box to adjust the output settings and save your 8-bit images.
Optimizing Your 8-bit Models
After converting your models to 8-bit, you may need to optimize them for better performance and visual appeal. Here are some tips to help you optimize your 8-bit models:
- Reduce the Number of Edges: If your models have too many edges, they may appear cluttered and difficult to render. Use the “Edge Loop” modifier to reduce the number of edges while maintaining the desired shape.
- Adjust the UV Mapping: Ensure that your models have proper UV mapping to avoid any stretching or distortion when rendering.
- Use Textures Wisely: While 8-bit art is primarily about color, textures can add depth and interest to your models. Use textures sparingly and choose ones that complement the limited color palette.
Conclusion
Converting your 3D models from


